Showing posts with label baking. Show all posts

Sunday, September 8, 2013

What Happened on the Farm in August

What Happened on the Farm in August:

Failed Ciabatta: I blame it on Brazilian flour, which is poor in gluten. The best flour contains 9% protein. And there is no gluten available for purchase.


Puppies born on our farm on the coldest day of the year. Just about 50 degrees Fahrenheit at night.


In old farm days, we used to buy wheat, corn, oyster shells, salt all conditioned in large cotton sacks. My father kept many of them so we could wash them (for several days, scrub, soak, wash, scrub, rinse, wash, bleach) for later use as a rug or rag.


Another bread-making failed attempt. I believe that the day was too cold for the dough to rise properly.


At least the pizza was good. But don´t be fooled by this photo. The use of banana leaves on the bottom didn´t work. I went back to placing the aluminum pizza tray on top of the charcoal.


These semolina bread loaves turned out great!


But not so for Jim Lahey´s No-Knead bread recipe. The terrible Brazilian flour again! None of my high hydration dough recipes work.

Wednesday, July 17, 2013

Macheesmo...

Macheesmo is a phrase that Nick (the site owner) "came up with that simply means having confidence in the kitchen". I think it is so funny as "machismo" in Portuguese means "men being superior to women", but I am sure he didn´t mean that. Anyway, I follow some of his recipes and have great success with semolina bread and English muffins, the pictures can tell everything.
The semolina bread recipe I just doubled, but everything else I followed as directed. It turned out fabulous, slightly dense in the middle, not so crunchy shell - the taste and texture were superior to any other home-baked bread I´ve done so far. The semolina flour really makes a difference. Note: semolina flour in Brazil resembles that of regular flour, but not so fine, with white opaque color, much drier. My next adventure will be semolina pasta. Has Nick any recipe?
The English muffin recipe I did not let it rise a second time as I also watched the Culinary Institute of America video. But what I thought to be wise is to stick the muffins into the oven to finish up cooking. I have had many underbaked goods in the past, and that is an experience I don´t want to repeat. So the tip was very good. I actually opened one of them without baking, and indeed, it was slightly raw.
While the English muffins were in the oven, I fixed the Hollandaise sauce and boiled fresh eggs I got that morning directly from under the chickens. It was the first time I used a splash of white vinegar to boil eggs and the whites didn´t spread in the pan. Another success! I am so glad. Happier yet when I dug my fork into the Eggs Benedict. I was able to replicate the ones I used to eat at Royal Cafe, in Albany, California.

Tuesday, July 16, 2013

Full Steam

Full steam, or should I say "full smoke"? I am back baking full power. Not always in my wood-fired oven, sometimes due to time crunch or because sometimes I need a more reliable oven. To tell you the truth, I have not mastered the wood firing system and I can´t trust myself the oven is going to be ready by the time the dough is. That´s why making pizza is so easy - you can keep feeding the fire until the pie is ready to go.
This time I played with new recipes such as sweet potato bun, pesto potato bread, semolina bread, hamburger bun, and the two great findings: focaccia made from overnight poolish (www.breadcetera.com) and English muffin, which it is not strictly baking, but it is bread. The recipe from www.macheesmo.com directed to stick the fried muffin into the oven so to finish cooking. Great tip! It made superb Eggs Benedict. Semolina bread was also from the same guy. I had never been able to make such a nicely dense bread in texture, yet light in taste. This was good with mortadella (better kind of bologna).
Sweet Potato Buns from http://blogmaetocomfome.blogspot.com.br/2013/05/pao-de-batata-doce.html (In Portuguese)
Pesto Potato Bread from don´t know where recipe...
40-Minute Hamburger Buns from http://www.tasteofhome.com/recipes/40-minute-hamburger-buns
Focaccia from http://www.breadcetera.com/?tag=focaccia

Saturday, April 20, 2013

We Go (coco)Nuts!


What if you have more coconuts than you can drink their water?


Yes! We primarily plant coconuts for the water it stores in young green fruit.
And...what if the coconuts are becoming riper and the water inside is drying out, while its pulp is getting thicker?


The only solution is to use the ripe pulp to make sweets and baked goods.

This one is called "queijadinha" - cheesecake, but it is actually made with grated coconut and just a little bit of cheese.


RECIPE:

4 eggs
1 cup sugar or sweetened condensed milk
2 TBSP butter
4 TBSP grated cheese (we use "meia cura", mild parmesan-like cheese)
200 grams fresh grated coconut (or hydrated dry coconut flakes)
1 cup coconut milk (or milk)
3 TBSP white flour
1 tsp baking powder

Beat the above ingredients item by item, until all incorporated. Bake at 375 F.
Now, the country cooking will throw all ingredients, and perhaps omitting the liquid, and leaving out flour and baking powder, for they prime the real taste of coconut.

Friday, January 4, 2013

Christmas Bread Panetone

Another quiet Christmas on the farm with my daughter being away. But the days that preceded Christmas, I baked panettone, an Italian round tall bread filled with candied fruits and raisins or with chocolate chips. My first attempt was a disaster. I followed a recipe that required a long rise, two days of work, just to have all the top burned by tucking it into a too hot an oven. I used a wood-fired oven, and I still don´t know what´s the right temperature for each dish. The second panettone was filled with chocolate chip and topped with ganache. They turned out very velvety, moist, and delicious. This time I used a regular gas oven. The third recipe I chose to fill it with dulce de leche (some kind of hard caramel). I made a mistake with the amount of butter and again, it was a failure. The bread didn´t rise properly while baking. But I still could give to my neighbors. But I was decided to make one great panettone, so again, I was mixing the ingredients when my mother had a seizure so I had to put the dough into the fridge to run to the hospital. When I got back home at 1:30 a.m., I didn´t feel like cooking. So I proceeded the next day, turning out a good panettone. The panettones and the two loaves on the photo are from this batch. I gave it to my friends as Christmas gifts. I felt as I had done a great accomplishment. But I was still not happy with sweetbreads and wanted to bake one more panettone, a savory one, filled with some kind of beef jerky, properly de-salted, cooked, shredded, and cooked with onions. This time, it was a success. The recipe asked for dark beer, milk powder, and even kummel, which I didn´t find in the market. So it went without it. Again, I gave one to each of my three farmer friends. Panetone dough is different from all other bread I have made before, as the dough is quite sticky, with high hydration. It is thicker than cake mix and wetter than bread dough. It also takes a lot of butter and egg yolks, a typical holiday bread. Panetone with its orange-butter-vanilla aroma, fruits, chocolate, caramel, the rich dough is a feast in itself. It is a kind of bread we can´t go without. It is a symbol of Christmas which for me exhale beauty, abundance, generosity, and love.

Saturday, February 25, 2012

Baking Season


Two beautiful Fall days in the middle of Summer. Who can explain that? It’s darker in the morning around 7, but the evening is still long with daylight savings. The sun rays have the orange hue, different from Spring were the sparkling silver rays invade all rooms. The lack of natural beauty of our landscape on the farm makes me enjoy the sensation brought by other senses. I am lucky for that matter. I am not a visual person.
February is here. My 10-year-old daughter is back in school. I still have to drive her five days a week on a rather short drive (about 6 miles) on a flat and straight road, but dangerous due to drivers’ carelessness.
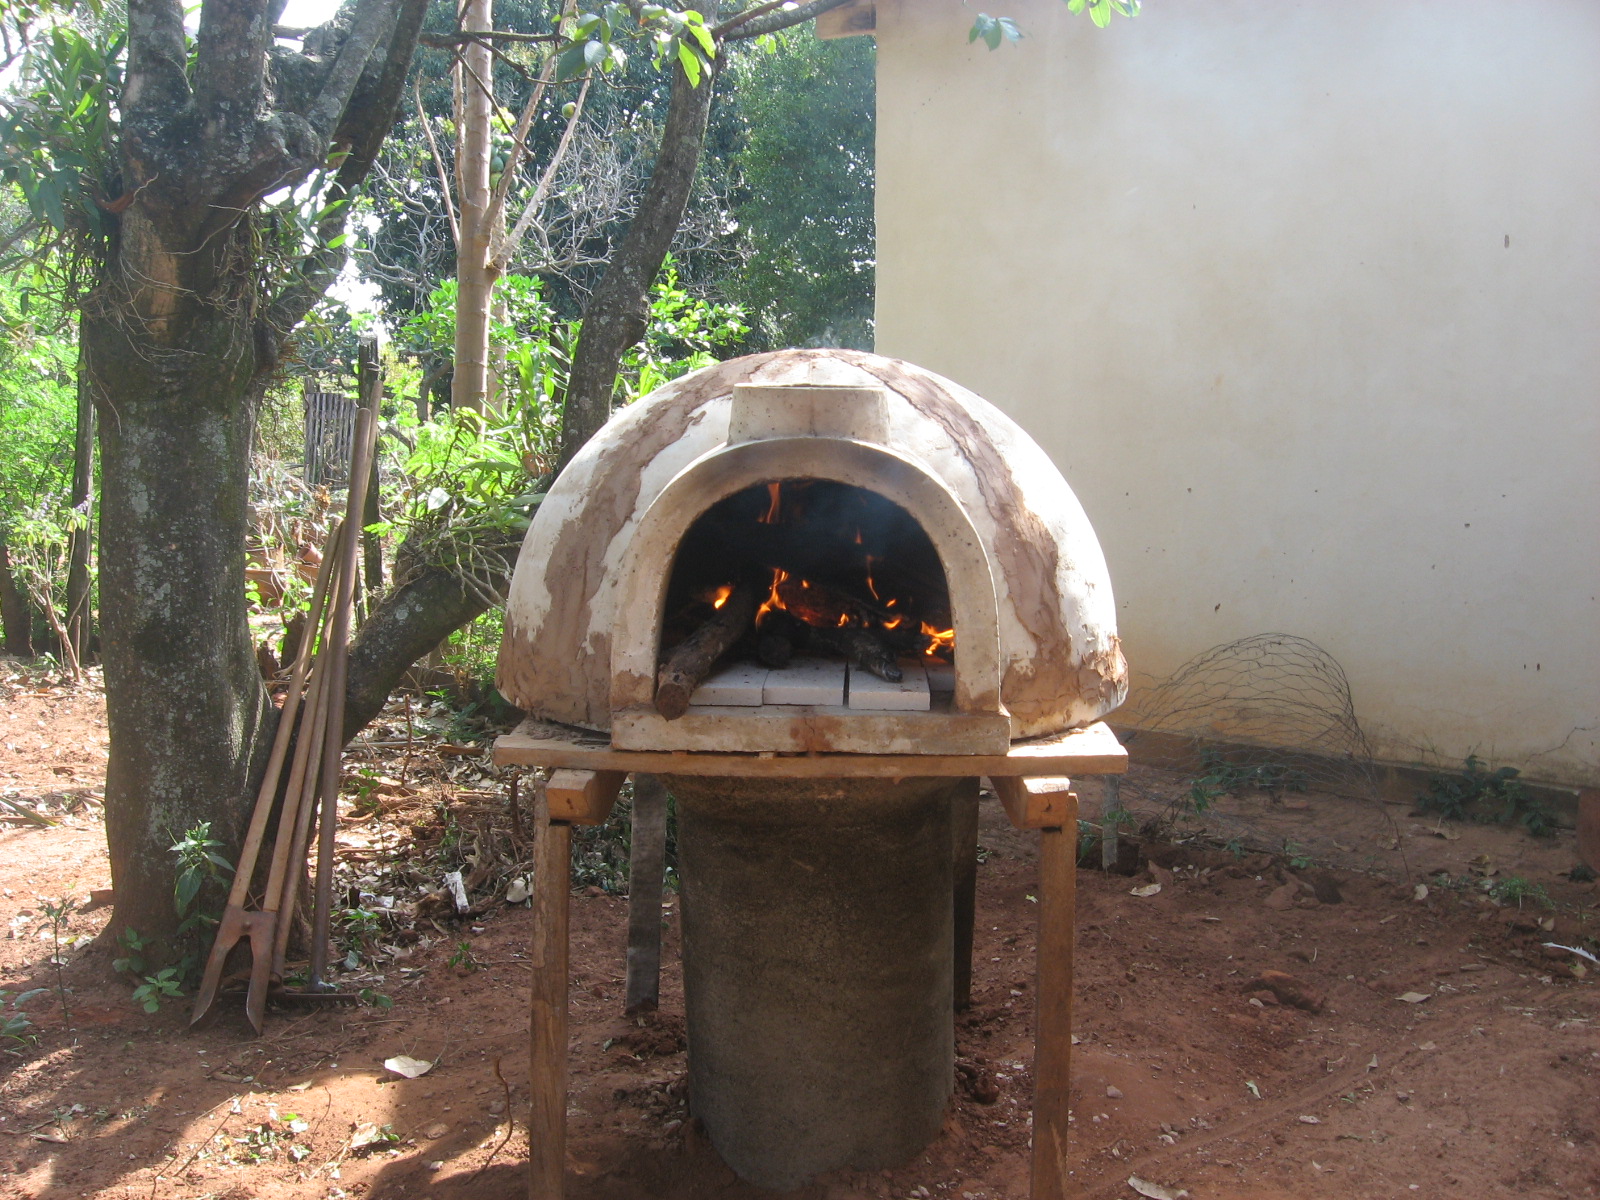
December and January were cooking, baking, eating months. Even though the doctor suspects I have gluten intolerance (no exams done), I baked several times a week using my newly assembled wood-fired oven. But the highlight was the church gathering day at my house. I tested several pizza dough recipes, watched the oven, learned to open the skin by hand until I found the best dough and the best way of serving piping hot pizza straight from the oven for several people. I didn’t know how many would come, so I planned for 30. I soon found out that I couldn’t open the skin and bake a raw crust to serve 30 hurried peopled at once. Too many issues involving the making of the perfect pizza, Neapolitan style. I had to compromise. I parbaked the crust a day before, topped 3 pizzas just 2 hours prior to serving, and hired a neighbor dona Rosa to take care of the baking. I took care of topping the pizza as the first ones got done. On my list, nine different combinations which included the all-American pepperoni or sausage, mushrooms, and bell peppers; also sliced smoked pork sausage with onions; ham, peas, onions, cooked eggs. All pizzas take tomato sauce (made with fresh and canned tomatoes) and mozzarella cheese. The event was a success, so much that I totally forgot to take a picture of the crowd around the pizza, all praising me with a full mouth, not knowing if they should speak or chew. I was as busy as a pizza maker on a ball day, topping on disk after the other. Later, I had to ask other people who ate what, who took the first piece, who had anchovy with olives. I sent home a few people with pizza for their family. “We had plenty. My husband ate, and even my mother-in-law” – someone told me.
I can't help myself but continue cooking, baking, soap making, and all. I also baked old fashioned English bread called scone to be dipped in lemon curd (it's a lemon season), Brazilian finger good called "empada" - little chicken pies, sweet rolls, broa (a country bread made in cooked corn and wheat flour, and later baked), Brazilian cheese bread, chocolate chip cookie, anise biscotti dipped in chocolate, whole wheat bread, and even "Artisan Bread in Five Minutes a Day" bread. And more pizzas, of course.
I can't post pictures of all my bakings, neither remember all that I cooked - there were so many goodies.

Saturday, October 29, 2011

Portuguese Bread Folar

Folar is an Easter bread that can be sweet or savory, depending upon the region of Portugal. What is different about this recipe is the incredible amount of eggs in the dough. The best thing is that it turns out light, fluffy, yet full of flavor, with a delicate crust that melts in the mouth. The first time I heard about folar was at a hair salon. The lady taught me how to make this bread, and also paella with rabbit meat. I never got to make the paella her way, but I sure made folar a few times. Over twenty years had passed, and here am I again making folar on an improved recipe I found on the internet at www.gastronomias.com. For those ones who cannot read Portuguese, I shall translate it for you with my own personal twist (and experience). This is a great recipe. 1 kg all-purpose flour 12 eggs (yes, 12!) with shells warmed in warm water before breaking 250g melted butter 50g olive oil 30g compressed fresh yeast melted in ¼ cup warm water Warm milk and salt Smoked sausage sliced, salt pork or bacon cut into small cubes, ham, roasted chicken In a large bowl, make a well in the center of the flour. Pour melted yeast and eggs, mixing in a circle, adding the flour little by little. Add butter and oil. If the dough is stiff, add a little bit of warm milk with salt to taste. It´s a soft dough, so you do more beating kind of movement than kneading until it forms a ball. Let it rise. The recipe instructs to divide the dough into 3 and make layers (like lasagna) with meat. Let it rise again, and then, brush with egg wash, and bake in a hot oven for 45 minutes. I have done it differently. I was so tired and sleepy that night that I stashed into the fridge until the next morning. I took it out of the fridge, kneaded a bit, and stretched with a hand roller. I cut the dough into 2, opened it like a pizza crust, and spread the meat over. I rolled it (like would sushi), tucked the sides underneath, and let it rise. Over two hours later, and with the dough risen greatly, I popped them in a hot oven for about 30 minutes. I lowed the temperature a bit, so as not to burn. They came out huge, light, fluffy, and tasty. The next day I used the same recipe and process, but filled with provolone cheese and the other piece with green olives. I can’t say which one is the best.

Getting the Real Thing

When I first took an interest in country-style bread baked in a wood-fired oven, I asked my neighbor that I barely knew to teach me the secrets of the trade. I was after the type of bread stored in my childhood memories that tasted much different from the bread I eat today, even if baked in wood-fired ovens. Dona Rosa, then, told me that her sister who lives several miles away had “yeast in a bottle”. A few days ago, I put in a bag a package of cookies, flour, and sugar (these were to be given as gifts), picked up Dona Rosa, and headed for her sister´s house. She lives in a very small rural community of dozen homes in a rather scenic route. I used to drive this road while taking “Pro-Milk”, a course to learn how to work with milking cows. We were greeted by four women, an elderly lady, two middle-aged women, and a teenager. The older lady is Dona Rosa´s mother who is already a great-great-grandmother. Dona Rosa herself turned a great-grandmother at the age of 50. Anyway, we all seated on the sofa and they talked about people’s state of health. I tried to be interested but my mind wondered how soon I was going to see the starter. I noticed that the wood walls looked grungy, as my mom used to say the wood houses always look dirty and dark. Sometimes it holds a smell. At a certain point, the lady announced that she would make some coffee and disappeared into the kitchen. About thirty minutes later, she invited us to sit at the table. She served us two plain deep-fried dough. Davina said that the first one was made of flour, water, and baking powder. The second one was made with a sourdough starter, “so I could see the difference”. Anything fried makes just flour and water taste delicious. Some were puffed up, but they had no filling. Over an hour and still no signs of the starter. Only when everybody was finished, included some family members that joined us later that Davina took the prized starter from the fridge, kept in a 1-liter Coke plastic bottle. About one inch of flour on the bottom, and 500 ml of liquid. It was inert, no bubbles or foam. It looked flat and watery. She gave me the recipe to feed the starter: 9 tablespoons of flour, 3 tablespoons of sugar, and 1 teaspoon of salt. She omits the type of spoon, so on my first experience, I added too much salt. The great day came; I treated my starter, took half for the bread, and kept half in the fridge. The bread recipe was 2 kg flour, 500 or 600 ml starter, less than a cup of oil, some water, sugar, and salt. The dough came out very stiff, but I didn’t know how it was supposed to be. So I added more starter and oil. I left the dough rest for the night, punched it down the next morning, stretched the dough with a hand roller, and free-formed them. Another few hours until they went to Dona Rosa’s wood-fired oven. The bread smelled like sweet yeast (if this thing exists), it tasted slightly sour, but not quite like California sourdough bread. The density and the texture, besides the pale color of the crust, definitely I can tell that I have reproduced the bread of my childhood. The bread became better with further bakings, and I have used the starter to make a deep-fried dough and also pizza crust. I thought to be a mix of tough and chewy crust, but the taste had character. Something to become addicted to. The next day, I heated over a dry pan and the crust became crunch and even more delicious. I am still to try sourdough pancakes and guava paste filled fried dough. Yeah, I dumped the two other starters I had made at home from scratch. They were too sour, almost offensive. To taste, the “yeast in a bottle” is sweet and mild. Interestingly, it rises better in a tall narrow container. When kept tightly closed in a bottle, at the opening, it may burst like champagne. How fun!

Saturday, October 15, 2011

October 11, 2011 - My Very First Sourdough Bread

My Very First Sourdough Bread I am diving deep into the rural culture of doing everything from scratch. After the experience of baking pizza in my new wood-fired oven, I took interest in the wild yeast fermentation process, the .sourdough starter. Most of the time, my only door to the outside world is the internet. I researched all I could to learn the process. It is rather a very easy thing, just like soapmaking. I began with two different recipes, one that I followed more closely, and the other one that I ended up doing my way – both turned out OK. In the first days, neither mixture would show anything except slight deterioration. The chef James Beard´s recipe called for flour, sugar, milk, water, and later on, a package of dry commercial yeast. As I had only instant dry yeast, I used compressed fresh yeast. The mixture never really bubbled, looking more like yogurt, even though it smelled like good beer. The other mixture I used just flour and water, and it looked flat, lifeless until I decided to feed more flour. Then, it started to foam. Unlike others I have seen on the internet that make large bubbles, even on the bottom of the container, mine was foamy only on top, but sticky all through. After seven days or so, I prepared Beard´s recipe. For the bread dough itself, he calls for a package of active dry yeast, which I didn´t have (I found only the instant one or the compressed kind in the store), so I was forced to use the instant yeast, as the compressed had green mold on it. It took a rise, a punch down, another rise, and then to shape it into a roll. I think my problem started at this point, as the end result was a flat, dense, slightly raw tasting bread, which ended up tasting deliciously tangy, with a dry thick crust on top and smushy bottom. First, I left the dough rise too long for the type of yeast after I shaped it. The dough opened on the top, showing some bubbles. Then, it suffered from the low-temperature oven, which instead of baking in 30 minutes, took over an hour. I was so dismayed that I would have gone to town to buy a good stove just to bake my other bread tomorrow. But tomorrow is a holiday and all stores are closed. Meanwhile, the other dough is still left to rise. I am soon going to punch down and mold it into a free form and tomorrow, to see how it tastes. I am most curious about this one as it doesn´t have any commercial yeast, and the dough rose wonderfully. I am going to ask my neighbors to help me bake my bread in their wood-fired oven. Or I will lose my hard-worked dough. After all, for this one, it is going to be 10 days of watching, caring, kneading, and expecting.

Sunday, October 2, 2011

October 2, 2011 - Pizza Passion Or Oven Anxiety

I had plans of building a brick oven using red earth as a mortar, just like many other cheap and common igloo-shaped ovens around here. But I remembered that the Baptist Church that runs an orphanage in the next town had an abandoned pre-molded oven. They once told me "it burned the bread". At that time, I thought that the oven was made with concrete. Only later I found out that they used a refractory concrete, which makes the oven perfectly usable. The same day I got the metal wood stove, I ran to the orphanage and asked for the oven. The pastor didn´t know the current price so couldn´t sell it right away. I had a price set on my mind, but for some reason, I had forgotten how much it costs in the store. A couple days later, I showed up and told him the price (R$390 for a brand new similar type). He sold me for R$150 and I offered him $20 extra to have it delivered the next day. I had also put a donation on my first visit. The whole adventure cost me R$210. But it doesn´t end there. The anxiety of trying out the oven (to see if it really burns the bread) and eating a homemade pizza, I had the carpenters who are fixing up my house to set my oven just for that occasion. I had rolled a heavy sewage concrete pipe to my yard and made a hole to hasten their job the following day. So they used red earth and cement as a mortar to glue the pieces together. So, I made pizza not only once, but three times on my improvised oven stand. A few accidents happened, such as the wooden piece I had placed under the oven (without isolating it with bricks) caught on fire, the whole Calabrese sausage onion pizza fell upside down on the dirt and serving some uncooked burned pizza with ashes on top for guests who were in a hurry. I got valuable lessons from it: can´t hurry the oven fire, can´t hurry the oven construction, and don´t walk around with a hot pan of Calabrese pizza. My oven is still on an improvised stand, and I guess, it is going to be a few more days (or weeks) to have it in a permanent place, under a firm brick stand, over a concrete pad. I have also bought a big roll of fiberglass used in refrigerators to place it around the igloo to insulate the heat. We don´t use this material/technique in Brazil, but I have seen on youtube, so I decided to include it on my oven construction. While I can´t use my igloo oven, I keep using my regular gas stove for baking.